Categories
Uncategorised

GD2 Blog: Week 11

Unreal FPS part 1

As of the 13th of December, I’ve started following one of the official tutorials on using C++ with Unreal to help familiarize myself with navigating the documentation of the engine.

The tutorial I’ve been following is for how to implement mechanics for a First Person Shooter game.

You can find this here: https://docs.unrealengine.com/4.27/en-US/ProgrammingAndScripting/ProgrammingWithCPP/CPPTutorials/FirstPersonShooter/

First off, these are the inputs we will be adding to the project.

Figure 1
Figure 2

Movement is straightforward, as the values from the input scales are put towards movement input functions.

Figure 3

As for mouse movement, this is also fairly straightforward as we just set our mouse axis to the functions “AddControllerYawInput” and “AddControllerPitchInput”, which allow the player to rotate their view on the X and Y axis.

Figure 4

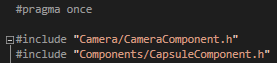
The tutorial also followed with us importing a mesh for the player and setting up a camera component, this is done by expanding our list of included files in the header file of the player character – this allows us to access more camera related functions.

“This will allow your code to access more camera-related functions, and will ultimately allow you to manipulate your camera placement.”

docs.unrealengine, 2021

Figure 5
Figure 6

Once we’ve added our new components from our header file, we’re able to modify them in our cpp file like so.

As seen in Figure 7, we create the camera component and then attach it to the capsule – we also allow the player pawn to control the rotation of our camera as well.

Included is also a mesh component which we added by using a USkeletalMeshComponent, we set this to be seen only by the owner and attach it to our camera so it follows where it goes.

Figure 7
Figure 8

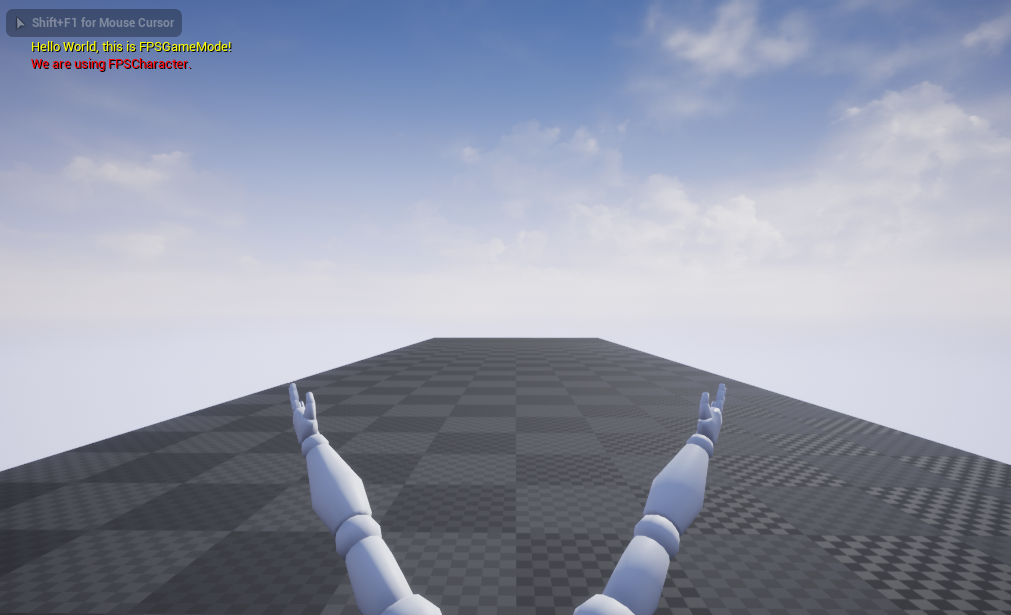
This was the final result, we had a character that was able to move and look around including having a mesh and camera.

To add onto this tutorial, I decided to try and add one mechanic on my own – I tried to implement an input that would let the player crouch, which is not covered in the tutorial.

https://docs.unrealengine.com/4.27/en-US/API/Runtime/Engine/GameFramework/UCharacterMovementComponent/

Using this documentation, I was able to gather a bunch of useful functions that worked in making the player crouch fairly easily.

Figure 9

Unreal has both a Crouch and Uncrouch function, which request the player to start or stop crouching respectively, they also call two other functions called “OnStartCrouch” and “OnEndCrouch” which I will be using.

Figure 10

Using a virtual void, I called these two useful functions which help detect when the player starts and stops crouching, so far these will be used to simply change the camera position to be lowered.

Figure 11

Using one of the variables, I’m able to set the height of the camera to be the half height of the capsule once crouching is initiated.

“HalfHeightAdjust: Difference between default collision half-height, and actual crouched capsule half-height.”

“ScaledHalfHeightAdjust: Difference after component scale is taken in to account.”

docs.unrealengine, 2021

Figure 12

When crouching is ended however, I just set the camera’s position to the BaseEyeHeight of the character’s capsule.

Figure 13

In-game, when the player pressed CTRL, then their capsule size would half and the camera drops down with it – the player would also be small enough to fit under objects they wouldn’t be able to pass through if they were standing.

I feel as if this was a good way to get myself more familiar with the Unreal Engine documentation, as it contains many helpful C++ tutorials as well as containing many references to functions used within them.

Bibliography

Docs.unrealengine.com. 2021. First Person Shooter Tutorial. [online] Available at: https://docs.unrealengine.com/4.27/en-US/ProgrammingAndScripting/ProgrammingWithCPP/CPPTutorials/FirstPersonShooter/ [Accessed 13 December 2021].

Docs.unrealengine.com. 2021. UCharacterMovementComponent. [online] Available at: https://docs.unrealengine.com/4.27/en-US/API/Runtime/Engine/GameFramework/UCharacterMovementComponent/ [Accessed 13 December 2021].

Docs.unrealengine.com. 2021. ACharacter::OnStartCrouch. [online] Available at: https://docs.unrealengine.com/4.27/en-US/API/Runtime/Engine/GameFramework/ACharacter/OnStartCrouch/ [Accessed 13 December 2021].

Categories
Uncategorised

GD2 Blog: Week 10

Game Jam

As of the 6th of December, we started a game jam that’d last for a week. Grouping with 5 other people, we managed to work on a game under the theme of implementing 10 seconds into our game.

We spent our first couple of hours planning what our game was going to be, and we settled on the idea of 10 second escape rooms, however instead of having to complete one room in 10 seconds, there was a monster getting closer to the player every 10 seconds.

We thought of different possible styles for the game and its mechanics, and settled on doing a horror themed game with fixed camera angles coupled with a retro looking style (See Figure 1).

Figure 1

Upon further planning, we decided on what mechanics we’d want for an escape room style game – most of which ended up being simple puzzle ones such as pressure plates, moving crates and switches.

With these in mind, I sketched out the first 6 levels introducing each mechanic one by one until mixing them together by the last couple of rooms – this will be done without any tutorial and will instead be done with a more simpler style of level design (See Figure 2).

“Introduce new elements in isolation”

“Show players instead of telling them”

“Teach through repetition”

Abhishek Iyer, 2020

We’ll be doing this as to keep our game as simple as possible for the gamejam, due to its fast paced nature we will need to teach the player as fast as possible rather than to hold them back by explaining with tutorials.

Figure 2

Once started on the game, I worked on the level design and mechanics – the player mechanics and controls were handled by a different member of the team.

Figure 3 shows the final product of the game, which features a fully working UI system that shows the player their current room location as well as the monster’s, included is also a flashlight which shows its current charge.

I’ll be going into how I created the structure of the first 6 puzzles in the game. The following puzzle in this starter room is to stack the crate on the pressure plate, which is wired to a locked door.

Figure 3

Following the stacking mechanic introduced earlier, the player is given a puzzle where they must form a bridge by stacking crates next to eachother to get to the other side of a gap.

Figure 4

The next puzzle introduces a new mechanic, which is a switch. The player simply walks up to this to open up a locked door similar to the pressure plate but it doesn’t require a crate.

Figure 5

The next puzzle combines the mechanics of the last couple of puzzles, where the player needs to stack a crate to get across a gap into a room with a switch, this then unlocks the door the player can carry the previous crate through to place on a pressure plate.

Figure 6

The next puzzle is similar to the last one, but is in a dark area the player has to navigate, this is where the flashlight mechanic comes in to help the player see in the dark.

Figure 7

The next puzzle level introduces elevators, this level starts off with a crate already on a pressure plate which immediately calls down an elevator to the player’s view. The player uses this to take the crate off the pressure plate which then reverses the elevator to go up and onto the platform.

Figure 8

Detailing further about how the 10 second mechanic works, every room you succeed in passing rewards the player an extra 10 seconds that carries over. This means the player will be rewarded with more time the faster they solve a level.

However after each 10 seconds that pass, the monster will also go forwards by 1 room – this is depicted in-game by a screenshake and UI warning that the monster is approaching closer. If the monster is behind the player by one room, then they will start to appear in the current room the player is in before catching up and sending them to a gameover state.

This should emit a feeling of pressure and panic into the player, which I feel conveys the horror part of the game quite well, as it seems that the monster is actively hunting the player.

Figure 9

For our game, I feel as if we managed to achieve our goal for what we set out to do and made a fun puzzle game in the end whilst utilizing the game jam’s 10 second theme. I am quite proud of how everything turned out in the end, especially as this was one of the first games I worked on within a group.

Bibliography

Lowenthal, M., 2020. How Video Games Introduce Their Mechanics. [online] Pausebutton.substack.com. Available at: https://pausebutton.substack.com/p/how-video-games-introduce-their-mechanics [Accessed 13 December 2021].

Categories
Uncategorised

GD2 Blog: Week 9

Unreal Physics

As of November the 29th, I looked towards experimenting with physics in the Unreal Engine and made a Hovercraft using Blueprints.

Unreal uses Chaos Physics, which is smaller and faster compared to other commonly used physics engines such as PhysX. It is included in Unreal Engine 4.26 by default.

“Chaos Physics is a Beta feature that is the light-weight physics simulation solution used in Fortnite, and it includes the following major features:
RBAN (Rigid Body Animation Nodes)
Destruction
Cloth
Ragdoll
Vehicles”

docs.unrealengine, 2021

We’ll be looking into Impulses and Forces, which are physics interactions within the Unreal Engine.

Impulses are applied instantly, and can give a fixed amount of speed. These could be used for an immediate style of force like a ricochet, or speed power up.

These can be accumulated each tick and applied together so multiple calls to the function will increase together.

Figure 1, docs.unrealengine

Forces change velocity proportionate to the time the force is applied for, which can be used for things that build up over time such as a gravity or air resistance.

Like Impulses, Forces can also be accumulated each tick and applied together with multiple calls to the function.

f
Figure 2

Using Blueprints, I created a pawn of an elongated cube with simulated physics enabled to it. Attached to it are several scene components which determine the hover distance, spring and damping coefficients.

Figure 3

The Hovercraft’s scene components contain several variables, one for getting the reference of the parent vehicle and the hover distance and coefficients mentioned earlier.

There is also a Hover Delta variable which contains the elongation / compression of the spring, the Previous Hover Delta is used to calculate the speed of elongation / compression for the damper.

Figure 4

The hovercraft’s components use a line trace to detect its distance from the ground to the hovercraft itself, we then get its out hit and return value result.

yep
Figure 5

This is what the Hovercraft’s line traces look in-game, also shown is the hovercraft currently hovering using the blueprints in the next paragraphs.

Figure 6

To make sure the components make the player hover, we get the output of the line trace’s distance and subtract it with the hover distance to set the Hover Delta.

The next step is to set a cast to the parent vehicle’s primitive component and add a force to it – afterwards we then set the hover delta to our previous hover delta variable.

Underneath are calculations to use the previous hover delta with our damping coefficient, which is then added by our sprint coefficient. This is then multiplied by the get up vector and put towards the force we’re adding to the hovercraft.

Figure 7

To control our hovercraft, we use variables for the forward force and the turn torque. These values tend to be very large in quantity due to Unreal using CM as its base unit.

The event tick simply constantly applies the current force to push or turn the hovercraft forward or turn sideways.

Figure 8

In-game, the hovercraft is able to be controlled as well as climb over objects.

Figure 9

I think that this was a fun way to experiment with the possibilities of physics in Unreal, blueprints tend to be very effective and fast when putting together prototypes or tests. What I could possibly do next is to try and redo the task but in C++ instead, as I already have a prototype to base it off of.

Bibliography

Docs.unrealengine.com. 2021. Physics. [online] Available at: https://docs.unrealengine.com/4.27/en-US/InteractiveExperiences/Physics/ [Accessed 13 December 2021].

Docs.unrealengine.com. 2021. Chaos Physics. [online] Available at: https://docs.unrealengine.com/4.27/en-US/InteractiveExperiences/Physics/ChaosPhysics/ [Accessed 13 December 2021].

Docs.unrealengine.com. 2021. Add Impulse. [online] Available at: <https://docs.unrealengine.com/4.26/en-US/BlueprintAPI/Pawn/Components/CharacterMovement/AddImpulse/> [Accessed 13 December 2021].

Docs.unrealengine.com. 2021. Add Force. [online] Available at: https://docs.unrealengine.com/4.26/en-US/BlueprintAPI/Pawn/Components/CharacterMovement/AddForce/ [Accessed 13 December 2021].