Development Activity
Since October 26th, I’ve started work on my mechanic prototype. So far I’ve been using w3schools.com’s html tutorials to aid my progress, particularly the ‘game canvas’. This is an element that is displayed as a rectangular object on a web page, this is important because this particularly offers all the functionality you need for making games.
“The canvas element is perfect for making games in HTML. The canvas element offers all the functionality you need for making games.”
w3schools.com
As shown in Figure 1, I’m setting the canvas to my game. For my game, I’ve made the canvas longways.

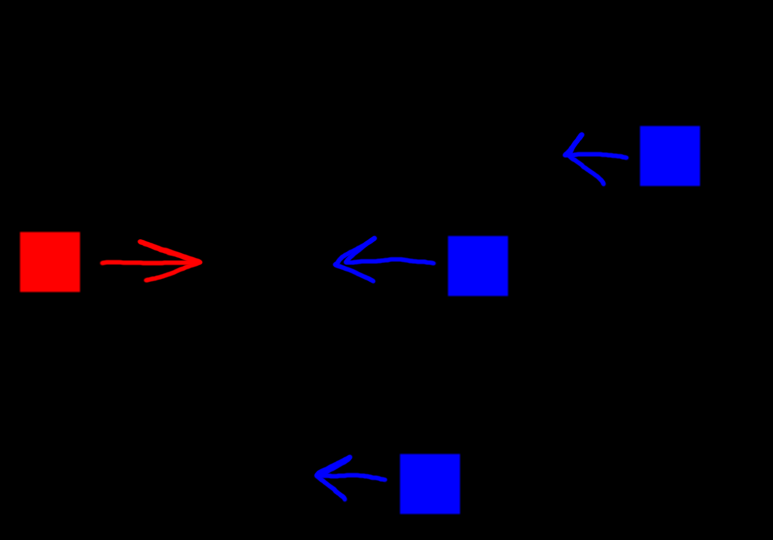
This is because I plan for the game setting to be a side-scroller, as movement from the left and right is going to emphasized with the player constantly moving towards the right and the enemies will be facing to their left as shown by my plan on Figure 2.
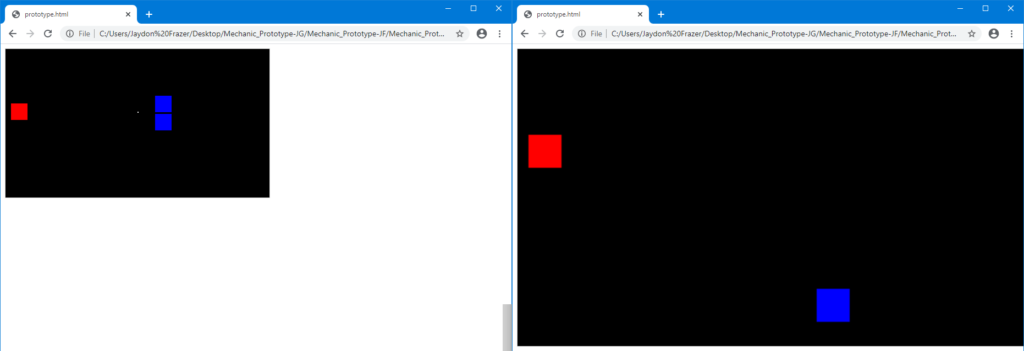
To improve upon this, I’ve also doubled the size of the canvas alongside all its components. The reason for this was to improve the visibility for the game so that it didn’t look too small whilst playing it on the browser.
Figure 3 shows the comparison between the old and new sizes.
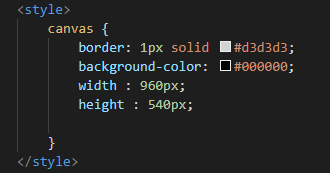
As shown on Figure 4, this was done very simply by going into the HTML code’s style, and adding in a width and height. This just simply changes how the game will be displayed on the browser and not the canvas or components themselves.
Alongside the canvas, I’ve also been working on implementing the player and enemy components of the game.
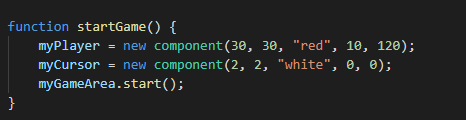
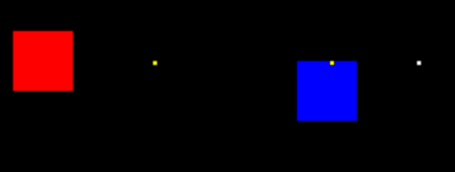
Although temporary, the player and enemies are represented as coloured squares; the player being red, enemies being blue. To implement the player, I added a function that adds a new component at the start of the game as represented by Figure 5.
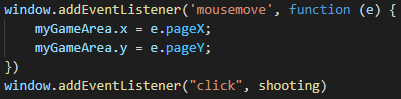
The player will be controlled by the mouse only, this will be how the player is able to move and shoot. To implement this, we will have to add in an ‘addEventListener’ function attached to the mouse.
“The addEventListener method attaches an event handler to the specified element.”
w3schools.com
As shown on Figure 6, we have several of these functions; The first one which determines the cursor’s x and y position as it moves, the other being the even that triggers another function called ‘shooting’ when the player puts in a left click input.
Both of these will allow the player to move and shoot.
To add onto the movement, I’ve also added in some restrictions as to where the player can or can’t move.
I’ve made it so that the player’s position in the game area only updates if the cursor is within the canvas, this is so that the player isn’t able to move anywhere outside of the canvas.
This was done by using If and Else statements, essentially Figure 7 shows that if the cursor’s y axis is less or higher than the canvas height or 0, it will set the player’s y position to still be within the canvas. If any of these statements are not being met, then the else function sets the player’s y position to the cursor’s which should be when the cursor is inside the canvas.
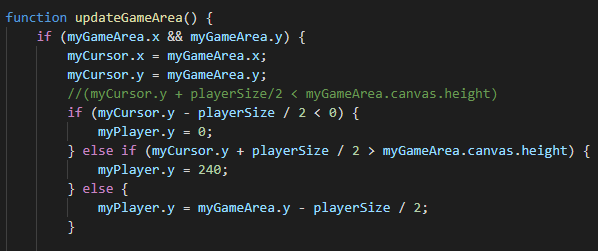
This was implemented as to keep the player from cheating and avoiding the enemies moving towards them all together. It is also considered keeping the game neater and more robust.
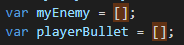
To create the bullet projectiles and enemies, I’ve used arrays to contain the both of them.
“An array is a special variable, which can hold more than one value at a time.”
w3schools.com
Since I plan on multiple bullets and enemies appearing, an array would help to keep track of each individual one. In Figure 8, I made both of these variables identically.
Within Figure 9, I have enemies that appear during randomized intervals to keep the appearance of enemies less predictable. Once this interval is completed, it will then spawn an enemy within a randomized spawn range. This will be done when the new ‘myEnemy’ component gets pushed.
As the enemy spawns, I’ve used a for loop function so that they will be moving at a -8 pixels a second towards the left. If the enemy moves out of the canvas, then they will be spliced from the array (This means they will be removed), however if they’re still within the canvas they will be drawn.
This is done to keep the amount of variables low so that the code is able to keep running better, you could say that this is a way of optimization as well which may prove important for less powerful pcs.

As for the bullets, there is a similar function although without the needed randomization as they will be coming from the player’s X and Y position seen in Figure 10.

Although, despite the player being able to shoot bullets and enemies being able to constantly spawn, one issue that arises is that these bullets did nothing towards the enemies. Usually they’d fly past the enemy without registering any collision on figure 11.
As seen on Figure 12, to create the collision between both of these objects, I made a couple of for loops, both of these made sure whether the same bullet and enemy were within each other’s range. Once touched, both objects with splice each other out of their own arrays.

As for now, I’ve managed to get a working foundation for the mechanic which I consider to be a success.
My aims for now would be to try and polish the gameplay much more, as well as adding in some sprites with frame-based animations to make the game look much more appealing and nicer to play.
I feel as if the difficulties here would be trying to get all the sprites to work without it affecting the gameplay, this might mean that I might have to change some of the hitboxes depending on the shape of the player and enemies.
Playtesting will also be important, as this will let me know about what other people think of my game. Upon listening to constructive criticism I may have to modify some of this code, or even implement new features which may also be a challenge given the time we’ve got.
Bibliography
W3schools.com. 2020. Game Tutorial. [online] Available at: <https://www.w3schools.com/graphics/game_canvas.asp> [Accessed 5 November 2020].
W3schools.com. 2020. Javascript DOM Eventlistener. [online] Available at: https://www.w3schools.com/js/js_htmldom_eventlistener.asp [Accessed 5 November 2020].
W3schools.com. 2020. Javascript Arrays. [online] Available at: https://www.w3schools.com/js/js_arrays.asp [Accessed 5 November 2020].